How to run your code from your external flash memory
Table of Contents
Preamble
This guide explains how to run your code from the external flash memory. It covers the following steps: 1. Flash the bootloader into the internal flash memory. 2. Adapt your project to the external flash memory. 3. Obtain the correct external loader for your flash memory (.stldr). 4. Flash your code into the external flash memory.
1. Flash the bootloader in the internal flash
Clone this Git repository: https://github.com/WeActStudio/MiniSTM32H7xx.git.
Make sure you are on the master branch.
Then go to the
SDK/HAL/STM32H750/11-ExtMem_Boot_USBfolder and copy it to your workspace. As you can see, it is a Keil µVision project.
Alternatively, you can directly download this file: 11-ExtMem_Boot_USB.elf or 11-ExtMem_Boot_USB.hex.
Open the
External_Flash_Downloading.iocfile with STM32CubeMX, and regenerate the code using Makefile as the Toolchain/IDE.Before compiling the code, complete the Makefile by adding these three lines at the end of the
C_SOURCESvariable:
Drivers/BSP/w25qxx/w25qxx_qspi.c \
Core/Src/debug.c \
Core/Src/hid_bootloader.c
Remember to add the \ separator at the end of the last line of C_SOURCES before finishing the list.
At the end of
C_INCLUDES, add this line (and remember to add\at the end of the previous line):-IDrivers/BSP/w25qxxBuild your project by running
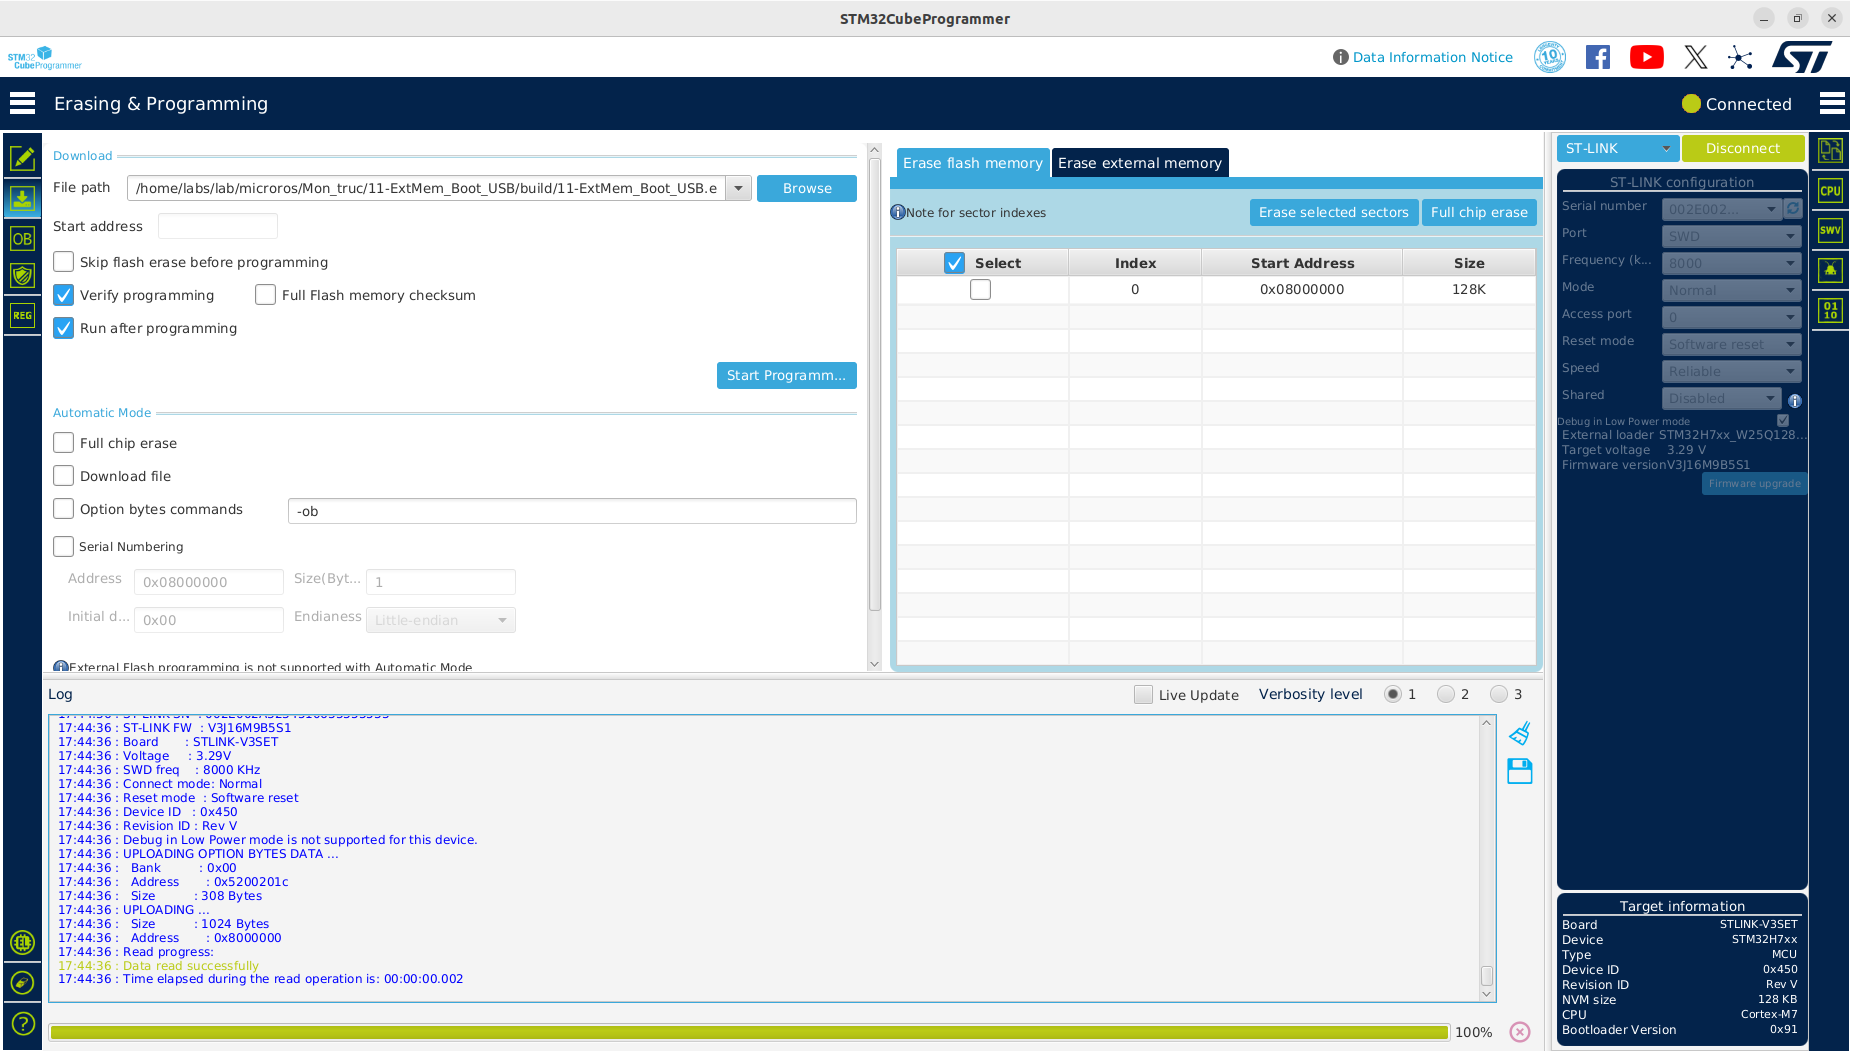
makein the terminal and verify that the compilation completes without errors.In STM32CubeProgrammer, open the Erasing & Programming menu and flash the bootloader (
11-ExtMem_Boot_USB.elfor11-ExtMem_Boot_USB.hex) into the internal flash memory of your STM32H750VBT6. The bootloader will then load your application from the external flash memory and execute it.
2. Modify your project so it fits the external flash memory
Now that you have built your project and flashed the bootloader into the internal flash, you can adapt the project to the external flash memory.
Then go to
STM32H750XX_FLASH.ldat the root of your project and replace this line:
FLASH (rx) : ORIGIN = 0x08000000, LENGTH = 128K
by this one :
FLASH (rx) : ORIGIN = 0x90000000, LENGTH = 8M
Go to
/Drivers/CMSIS/Device/ST/STM32H7xx/Include/stm32h750xx.hin your project and replace this line:
#define FLASH_BANK1_BASE (0x08000000UL) /*!< Base address of : (up to 128 KB) Flash Bank1 accessible over AXI */
by this one :
#define FLASH_BANK1_BASE QSPI_BASE /*!< Base address of : (up to 128 KB) Flash Bank1 accessible over AXI */
Note that in recent versions, you also need to uncomment this line in system_stm32h7xx.c:
#define USER_VECT_TAB_ADDRESS

This will change the memory mapping of your project to fit the external flash memory.
PS : Do not forget to comment MPU_Config(); line in main.c.
3. Flash your code in the external flash
Now that you have built your own project and flashed the bootloader in the internal flash, you can now flash your code in the external flash memory.
In the same Git repository you cloned earlier, move or copy the file
SDK/QSPI_Flasher/STM32H7xx_W25Q128_WeActStudio.stldrtoSTM32CubeProgrammer/bin/ExternalLoader, then restart STM32CubeProgrammer.In STM32CubeProgrammer, open the External Loaders menu and select the correct loader: STM32H7xx_W25Q128_WeActStudio.
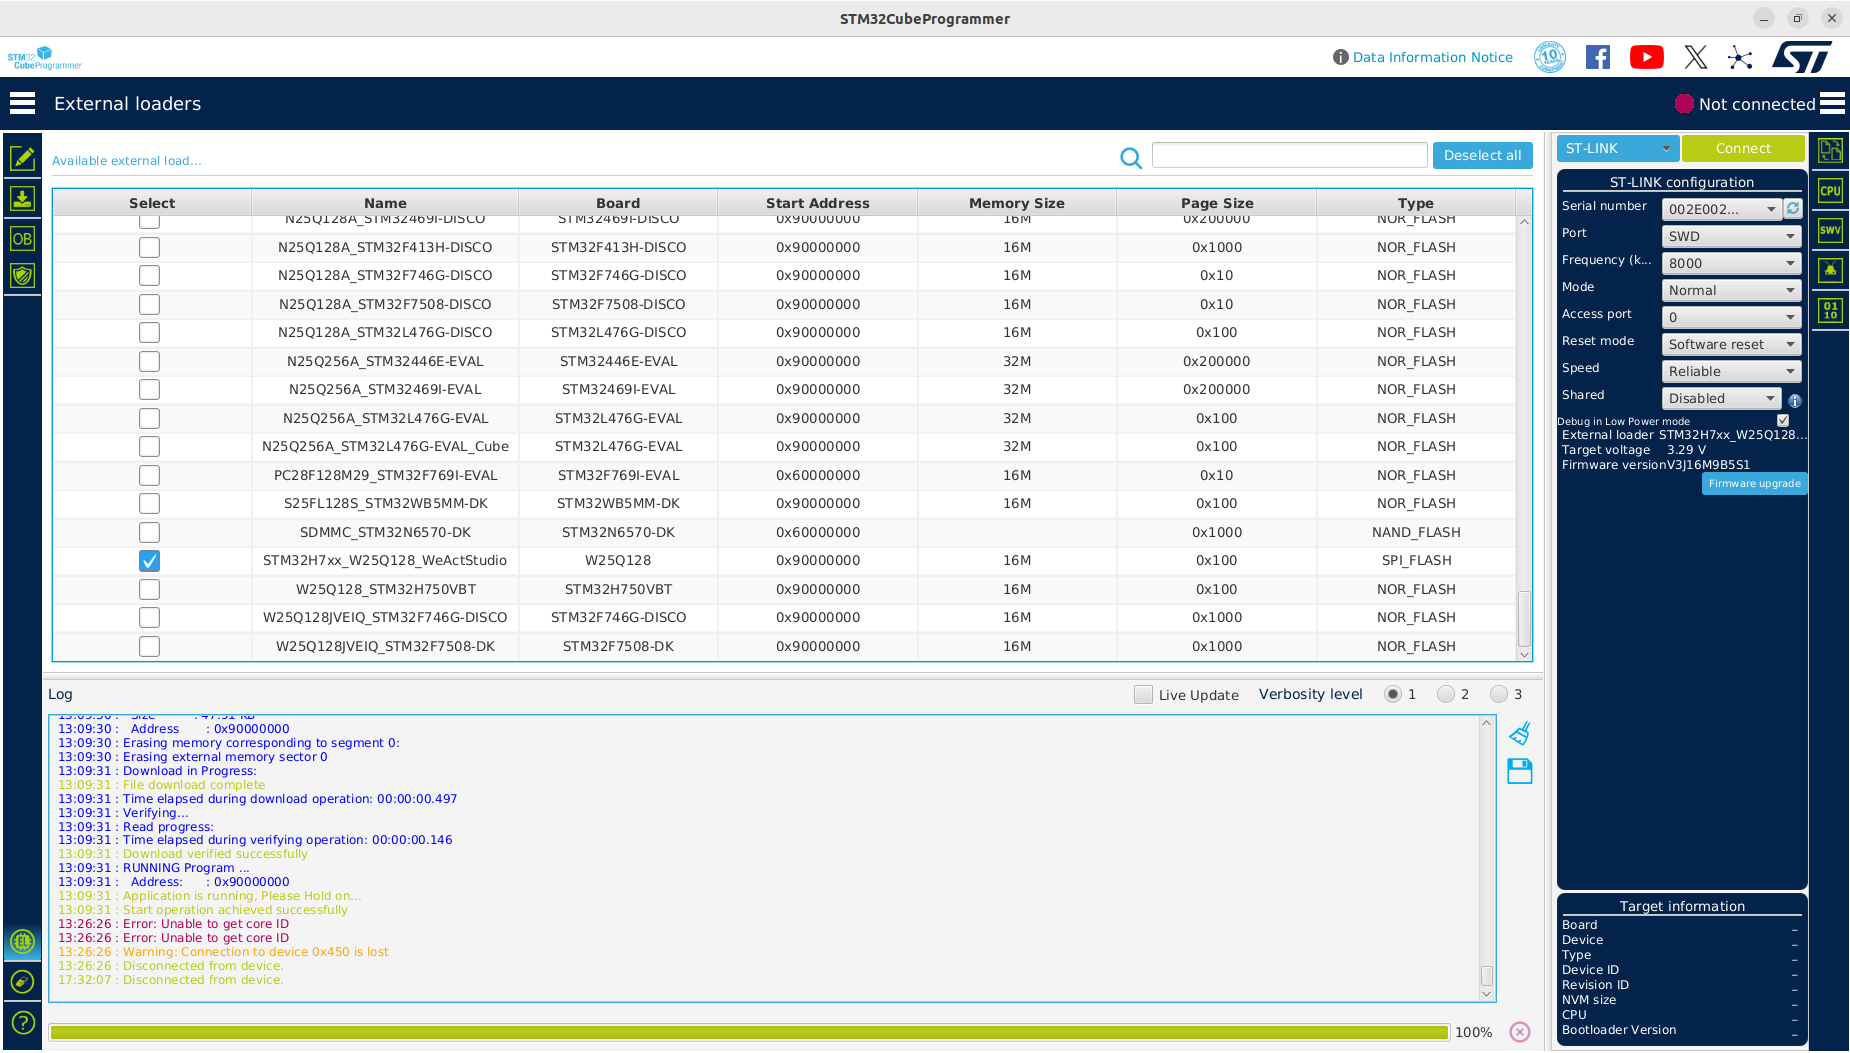
Go back to the Erasing & Programming menu, connect to your STM32H750VBT6, and select the file (.hex or .elf) you want to flash into the external memory. Then click Start Programming. The file will be written to the external flash, and the bootloader you flashed earlier will load and execute it.